Casting Hybrid Blanks To Turn Elk Calls
January 22, 2018
This project actually tackles two projects in one. First, I go through the process of casting hybrid turning blanks using Alumilite Clear Casting Resin and some scrap wood from a cutting board cuttoff. Then, I show my method for turning and assembling ultra sexy elk calls. These blanks can be used for almost anything you can dream up, so you can take the tips I give on elk call turning, and apply them to just about all resin turning.

To make the blank a hybrid, the first thing I have to do is trim some pieces of wood so that they just fit inside my mold mold.

Some of these are affiliate links, and I can benefit from your purchases. Some of them are just so you can easily find the stuff you need.
Materials
Tools
The enemy of casting resin is moisture, so I put the chunks of wood in an oven for several hours to make sure they are as dry as possible. In the video, I incorrectly stated that “If you try to cast these blanks with wet wood, the resin just won’t stick to it.” The real problem with casting using wood that contains moisture, is a an ugly bubbling along the edge of the wood that is caused by a reaction between the urethane in the resin and the water in the wood.

The Alumilite Clear casting resin is mixed one-to-one by weight, so I carefully pour out equal parts A and B into a clear cup on a kitchen scale. The clear cup is nice because it allows you to see your mixing process. Stir the two parts together, making sure to scrape the sides, until the mixture is completely clear.
If you watch the video closely, you can see that part B looks like it’s starting to congeal a bit when it’s being poured out. This is a sign that the resin is getting close to the end of its usable life. Take this as an indicator that it is time to use up this batch. If you let the bottle soak in a hot water bath for a while, (changing the water when it becomes cold) you can rejuvenate the resin a bit to help you squeeze a little more life out of it. This trick is just a bandaid, not a cure, and you should still use it up as quickly as possible.

Now here is the fun part. There are tons of different colored dyes and metallic powders available, so there is almost an endless number of combinations that you can put together to make a truly unique blank.
In this project, I’m using the Alumilite Slow resin, which has a 12 minute working time, so I had plenty of time to work with such a small batch. If you use the regular Alumilite, that working time is cut down to 7 minutes, but I find that I typically cast one of these small call blanks in 5 minutes or less - so there’s still plenty of time.

When I first started learning to use this stuff, I found out the hard way that it is REALLY important to use a good mold release. For my first few attempts, I used an ancient can that had been sitting on my shelf for years. The resin completely adhered to my mold and I ended up chipping it off the blank little chunks at a time. Rest in peace little mold.

I pulled the blocks of wood out of the oven about 10 minutes before getting started so they could cool down to room temperature. Then, I dropped the blocks in the mold and slowly poured the resin over the top.
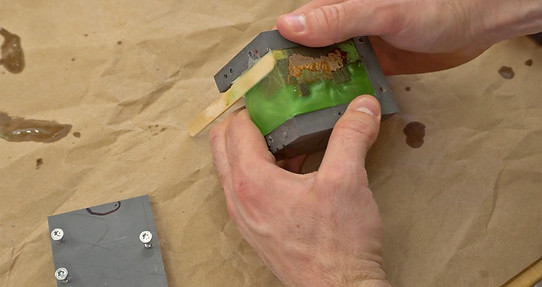
I’ve found that the blocks of wood tend to float to the top, so to keep that from happening I just use one of my stir sticks as a wedge and press it in between the wood and the side of the mold. I also tried using hot glue to hold the wood to the bottom, but because of the new good mold release, the hot glue wouldn’t stick.

Next, I just put the mold in a pressure pot, pressurize the container and waited for the resin to harden. The Slow resin can be removed from the mold in two to four hours. The regular kind only takes 45-90 minutes. Unless I’m in a hurry, I tend to let my blanks just sit over night.
The reason for using the pressure pot is to avoid getting bubbles in the blank. You might think a vacuum chamber would be the way to do this, but Alumilite hardens too fast, so you wouldn’t be able to get the bubbles out in time. By using a pressure pot, the bubbles are technically still there, but they are compressed down so small that you can’t see them. It only takes 30 psi to pull this off, but my pot is rated to 60 psi, so I pressurize mine to about 50.

After the resin has had enough time to harden, I disassemble my mold, usually just the bottom and side, and knock out the blank.

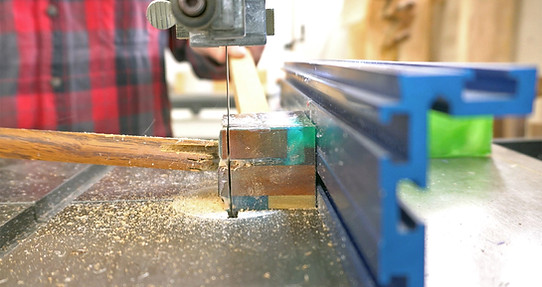
I use my bandsaw to square up the blanks. I set the fence to the width of the blank, then trim off the excess.

I drill a ⅝ inch hole up to a predetermined depth, then switch to a smaller drill bit to go all the way through. I’ll explain why I drill this stepped hole a little later.

To save some time with the roughing gouge, and to reduce the risk of chipping and tear-out, I cut the corners off the blank at the bandsaw so I am left with an octagon. I drilled the holes before this step, because the jaws on my lathe can grip the straight sides of the square blank better than it can grip these wavering sides coming off the bandsaw.

Next I mounted the blank on the mandrel, letting the small end stick out through the small hole. This definitely complicates the process a little bit, but I found that with a ⅝ inch hole all the way through, the call was just too loud. This way, the airflow is restricted and the sound is much better.

I used a roughing gouge turn the blank round, and down to it’s final diameter.

I have a rough template of the shape that I like, and I use it to mark out the high and low spots in the call. Then, I just turn it until the call comes out.

The sanding process for a resin blank starts out the same as any other material. Starting with a low grit, I sanded the call and progressed up through 1500, making sure to sand lengthwise between grits.
This is where the sanding process gets a little different. After the regular sandpaper, I wet sanded the calls using Alumilite Polishing Pads, starting at 1500 and going all the way through 20,000.

Here is a look at the difference this extra sanding and polishing makes. The call on the right was sanding using regular sandpaper up to 1500. The call on the left was polished up to 20,000. It take more time and effort, but the results speak for themselves.

This is the mouthpiece I like to use. There are lots of different options, but I just like the way this one sounds. They do come with some sharp edges that don’t feel to great on your lips, so I round the edges 220 grit paper, then make is smooth with 400.
They are easy to put together, just put the reed in place on the toneboard, then put the small half on top.
I roll one of these green rubber bands onto the end to hold the two halves together, then pop it up onto the lanyard groove. This way the whole mouthpiece stays together as one piece.
Then i put one of the green bands onto the toneboard, you can adjust the position of this to change the pitch of the call. These little green guys are actually castration bands that you can find at and farm and ranch type store.
Sometimes the mouth pieces don’t fit as snugly inside the call barrel as I would like. In those cases, I put a very small bead of CA glue all the way around the inside of the call, then spread it out with a matchstick. It doesn’t take much to build up that wall thickness so it grabs better. Then I hit it with activator and it’s ready to go.

The last step is to apply a finish. Since these calls will be used outside, potentially in the rain and snow, I used an exterior polyurethane.
I’ve found that the finish has no problem sticking to the Alumilite, but unfortunately it does bead up ever so slightly, causing a micro-dimpling type effect. This actually makes the call a little less slippery in your hand, but it ruins the look of the glass smooth finish we got with the polishing pads.
The best case scenario for these calls would be to stabilize the wood before casting it with the resin. That way, all of the materials would be waterproof before you even get started and therefore there would be no need for a finish.
One of these days I will get myself set up to do some wood stabilizing, and I will revisit this topic.


